How to Replace Fascia Wood Under Your Home’s Gutters – Home Guides
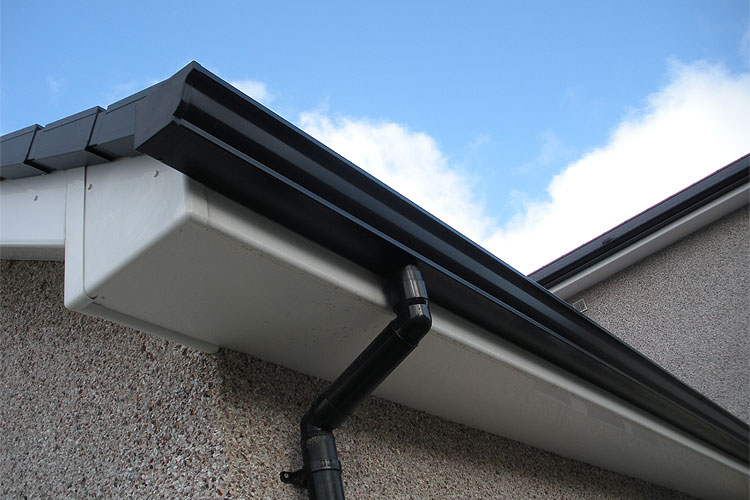
Fascia boards are boards that help hold your gutters in place and protect the edge of your roof. However, because they’re positioned just below the roofline, your fascias and guttering are exposed to a lot of moisture. Over time, this can often lead to rot, especially if the boards haven’t been periodically painted for their protection.
With moderate carpentry skills, you can remove your fascia board’s rotted section and replace it with a new piece of timber. In this article, we’ll give you a detailed step-by-step guide on how to do so. Just remember to take adequate safety precautions, especially because, as fascia boards sit high off the ground, you’ll be doing this work from a ladder.
If you would prefer to get a skilled, experienced professional in to handle your fascias and guttering instead, the trusted team at NZ spouting services can help. Just contact us at 0800 444 899 for all your spouting and guttering requirements.
Step 1: Measure Your Existing Board And Prepare The Replacement
The first step is to measure your existing fascia board to ensure that your replacement piece is the right size. You’ll also want to gather your tools and material, so you’re ready for the work ahead.
Step 2: Remove The Guttering
Once you’ve set up your ladder in a safe place, you need to remove the guttering from the areas where you’re going to replace the damaged fascia board. This is where the setups of fascias and guttering can vary.
Residential gutters are often installed using either long nails or metal clips that secure the guttering to the fascia.
If your gutters are attached using metal clips, you’ll need a pair of multigrips to pull these clips back so you can release the section of the guttering. If they were installed using nails, use a pry bar or hammer claw to carefully pry the nails away from the gutter.
Once the section is free, roll it out and place it on the ground.
Step 3: Lift The Roofing Off The Fascia Board
With your wrecking bar, pry the nails out of the roofing above the rotten fascia. Lift the roofing off the fascias and away from the guttering, and place a block underneath to prop it up. Make sure you remove any gutter brackets that might be in the way.
Carefully pry the old fascia board off, making sure to avoid damaging your roof, drip edge, and rafters in the process. If you have nails under the drip edge, you can cut them from behind, between the fascia board’s rafter and back using an oscillating tool with a metal cutting blade.
Remove any remaining nails from the rafter ends using a pry bar or hammer.
Step 4: Mark The Section You Will Cut
From the rotted section of the board, trace away from the fascias and guttering to find the nearest point where the fascia has been nailed into the roof joist. Draw a line between the nails and the piece you plan to remove. This way, the remaining fascia will still be properly nailed to the roof.
Step 5: Cut The Fascia Board
Set your saw blade to the board’s depth, and cut up from the bottom of the board. By setting your blade accordingly, you’ll be able to cut safely through the board without blunting it on the wall behind the fascia.
Step 6: Remove and Replace The Old Fascia Board
Using your wrecking bar, pry the rotten board off. Once you have removed the old, rotten fascias and nearby guttering, cut the new fascia board to the appropriate length. Set it into place, and attach it using galvanised nails or screws.
Continue this process until you have replaced all your damaged fascia boards.
Step 7: Seal The Join Between The Boards
Load a caulk gun with exterior-grade caulk. Apply an abundant amount of caulking to all corners, seams, screw or nail holes. By sealing the joints like this, you will help prevent moisture from getting into the wood and rotting it. This will help your replacement last longer.
Allow the caulk to set for the manufacturer’s recommended amount of time. You’re almost done. Now you just have to set up the new fascias and the guttering.
Step 8: Paint The New Fascia Board
Before painting your new board, you’ll have to prepare the surface. Give the whole fascia a light sanding. Then, apply at least two coats of exterior-grade paint on all the new boards.
Painting the wood will seal it and help prevent it from succumbing to rot caused by moisture, and significantly extend its life.
Step 9: Replace The Guttering
Reinstall your gutters with either nails or the metal gutter clips.
And just like that, you’re done! But if you don’t have the time to replace your fascia boards or don’t feel comfortable doing a replacement yourself, the experienced professionals at NZ Spouting Services can help. Just contact us at 0800 444 899 to discuss all your needs for fascias and guttering today.